Showing posts with label Crafting. Show all posts

Tuesday, January 18, 2011

Crafting Area/Office/Sewing Area

We have a HUGE basement in our place.  It's a TON of space.  The room is 16 x 21.  Charlie wanted to make it the living room, but I didn't think having the office on the main level off the open dining room would look good.  So, the office is in the basement.  Thinking back, I probably would've just put the living room downstairs.  It would've made Charlie happier and we would've had more space.  Also, it's my house what does it matter what other people think. However, I'm not helping lug his solid cherry L-shaped desk back up the stairs. 

The current set up is a vast improvement on what I had, but is nowhere close to what I want, but that's another post. 

*Warning* These pictures were taken in a basement.  There is ZERO natural light, and they didn't put over head lights down there.  Real smart. 

Moving on! Here is my area!


So, let's break it down. This is the bookshelf that houses most of my crafting stuff.  

This is the top shelf of my book shelf.  All my paper scraps, paper cutter, and a few of my scrapbooking supplies are stored here. The rest of my stuff is still in the basement.  I need to go through it. 


This is our super awesome printer we got on Black Friday for $50! 
We've been without a printer for a while so it's pretty nice.  This is also where Sophie likes to sleep while in the basement.


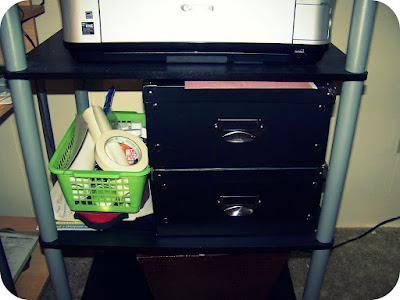
This is where I keep my scrapbook paper.  I got these boxes from Michael's when they were 40% off!  I also have any non-scrapbooking crafty items on this shelf.  I'm not going to post a picture of the bottom shelf, because it's just a trashcan. 


This is my desk.  I liked it when I got it.  Now it's aight, but I haven't found another desk I like.  My Silhouette machine and laptop live here.  Along with some plastic storage containers.  


Yes, I did cut out a giant vinyl damask and put it on my laptop.  I have a problem. I'm addicted to damask. 


I got the idea here.


This is my sewing machine! I got it at a flea market for $10! I kind of want to paint the desk, but I'm not sure what color yet.  That's my mother in law's sewing lamp.  She brought it over for my sewing lesson.  She forgot to take it back with her, but I'm not going to tell her.  I kind of like it. :)


Here is the desk opened up and the machine.


I was able to find the manual online on Singer's website.  Thank goodness, or I'd have no idea what to do.  The machine was sold in the early 70's.  So she's a golden oldie.  Literally.


One of the best parts of my office is my super awesome damask floor lamp I got from Target on clearance! woot woot!


I hope I'm able to get my area all decorated soon, but it's a LOT better than my old space.  

Hope you enjoyed it! 

<3,
Marlie


Saturday, January 8, 2011

Bathroom Wall Art

FINALLY done with this project! It wouldn't have taken me that long if I'd focused on it and done it all in one day, but I ran out of time last weekend.  So, I worked on it for an hour a couple of nights last week.  I've also been working on a gift for my little sisters.  We're doing our Christmas with my family MLK weekend so this is one of their Christmas gifts.  I'll do a post about this later.  I'm super excited about that post.   

I had lots of help from my kittens.  By help, I meant they stayed in my way.  It's really kind of sweet how they always like to be near me.  :)

This is Sophie.  I call her Sophie Anne when she's bad.  You know, like the Vampire Queen of Louisiana? I didn't name her after the character, though.

This is Lucy or Lucy Goosey or just Goosey or keeeetiiinnn.  I call her lots of different stuff.


So, as I said in my first post, my bathroom is so sparse and sad!  I stumbled upon the blog Make It and Love It.  It is amazing! I saw this post, and thought that was a great idea.  I filed it away for later.  Fast forward to a few days before our New Year's Eve get together.  I knew I'd have people over and I wanted to spruce up that bathroom.  So, that night I tried to find some stuff to put in the bathroom.  I was also in the process of putting away the Christmas stuff on my dining room table.  So, I had this cloth napkin on my table.  I got four of them at Cost Plus World Market a few years ago.  Before I got my cats, I always had them set up on my dining room table.  Once I got Sophie and Lucy, I had to put them away because I'd find them on the floor and I got tired of picking them up. SOOOO....I put one in the middle of the table and put candle sticks on it so they can't knock it off. mwahahaha! Your plans have been foiled, kittens!

Anyway, let me get back on track. So, I decided to use this napkin for the background fabric.  I got the black frames from Target on Black Friday.  They have this set of 12 frames for $12.  It has all different sizes and I've bought it two years in a row.  Next year, I'm going to buy two sets.  I purchased the red fabric to use as table runners for my wedding.  We ended up not using the tables that we rented for the wedding, and didn't need the fabric for runners.  Good thing, because I left it at home when I went to the wedding location.  My wedding weekend was filled with fiascos like this.  Someday I'll write a series about my wedding weekend.

Now, the link I posted above has all the steps for how to do this.  The basic steps are as follows:
  1. Cut a piece of cardboard to fit your frame. 
  2. Cut fabric to glue to frame.  Make sure you leave enough extra fabric to fold over and adhere to the cardboard. 
  3. Hot glue fabric to the cardboard.
  4. Make your fabric flower. For the love of all that is holy, DO NOT use hot glue.  You'll see why in my photos. Also, it burns the mess out of your hands.  In one of the tutorials I used they warned me, but I was inpatient and didn't want to have to go buy fabric glue. 
I made three flowers like Ashley from MILI (Make It and Love It. I'm just throwing that name out there and seeing what sticks). 

Flower #1:  Tutorial from Our Best Bites. Mine didn't turn out as well as their flower, but oh well.


Flower #2: Tutorial from MILI (It stuck).  She states in her post that there's no real science to this flower. I just used this as the starting point. 


Flower #3:  This one starts out the same as the flower #2, but only for the center.  I changed the way the outer layers were done.  
   
I would gather the fabric a little and then glue it down.  I kept going around until I'd finished the first layer.


This is what the flower looked like before I added some more fabric to the outside.  I almost wished I hadn't, but then the flower would've been too small. Oh, well.  You live and you learn.

Flower #3 on the background:


Once you've completed your fabric flowers, just glue them to your fabric covered cardboard.  Then put the cardboard in the frame and hang it up!  That's not too bad, right? This was the first time I'd made fabric flowers. They have some imperfections, but I love them. 

The finished project!  It adds some color to my bathroom and gave me jumping off point for the rest of the decorating.  Now, I'm looking for the perfect shower curtain. 

I hope you guys enjoyed! Thanks for reading!

<3,
Marlie